
Why the Right Spot Matters for Your IM Shot
Places for intramuscular injection are critical to know whether you’re self-administering hormone therapy, receiving vaccines, or getting other medical treatments. The location you choose affects everything from how well your medication works to how much discomfort you experience.
The four primary places for intramuscular injection are:
- Upper arm (deltoid muscle) – Best for small volumes (1-2 mL), commonly used for vaccines
- Hip (ventrogluteal site) – Safest option for adults and children over 7 months, holds larger volumes
- Thigh (vastus lateralis) – Ideal for self-injection, preferred site for infants and children
- Buttocks (dorsogluteal) – Less recommended due to nerve injury risk, requires professional administration
Choosing the wrong spot can lead to nerve damage, poor medication absorption, or unnecessary pain. The deltoid muscle can only handle small medication volumes, while the ventrogluteal site stays far from major nerves and blood vessels. Your muscle choice depends on the medication volume, your age, and whether you’re giving the shot yourself.
Each site has specific landmarks to help you find the safest injection zone. For example, the vastus lateralis in your outer thigh works great for self-injection because it’s easy to reach and has low risk of hitting important structures.
I’m Jeff Nuziard, CEO of Sexual Wellness Centers of America, and I’ve helped thousands of patients understand proper injection techniques for hormone therapy and other treatments. Through years of patient education, I’ve seen how knowing the right places for intramuscular injection makes treatments more effective and comfortable.
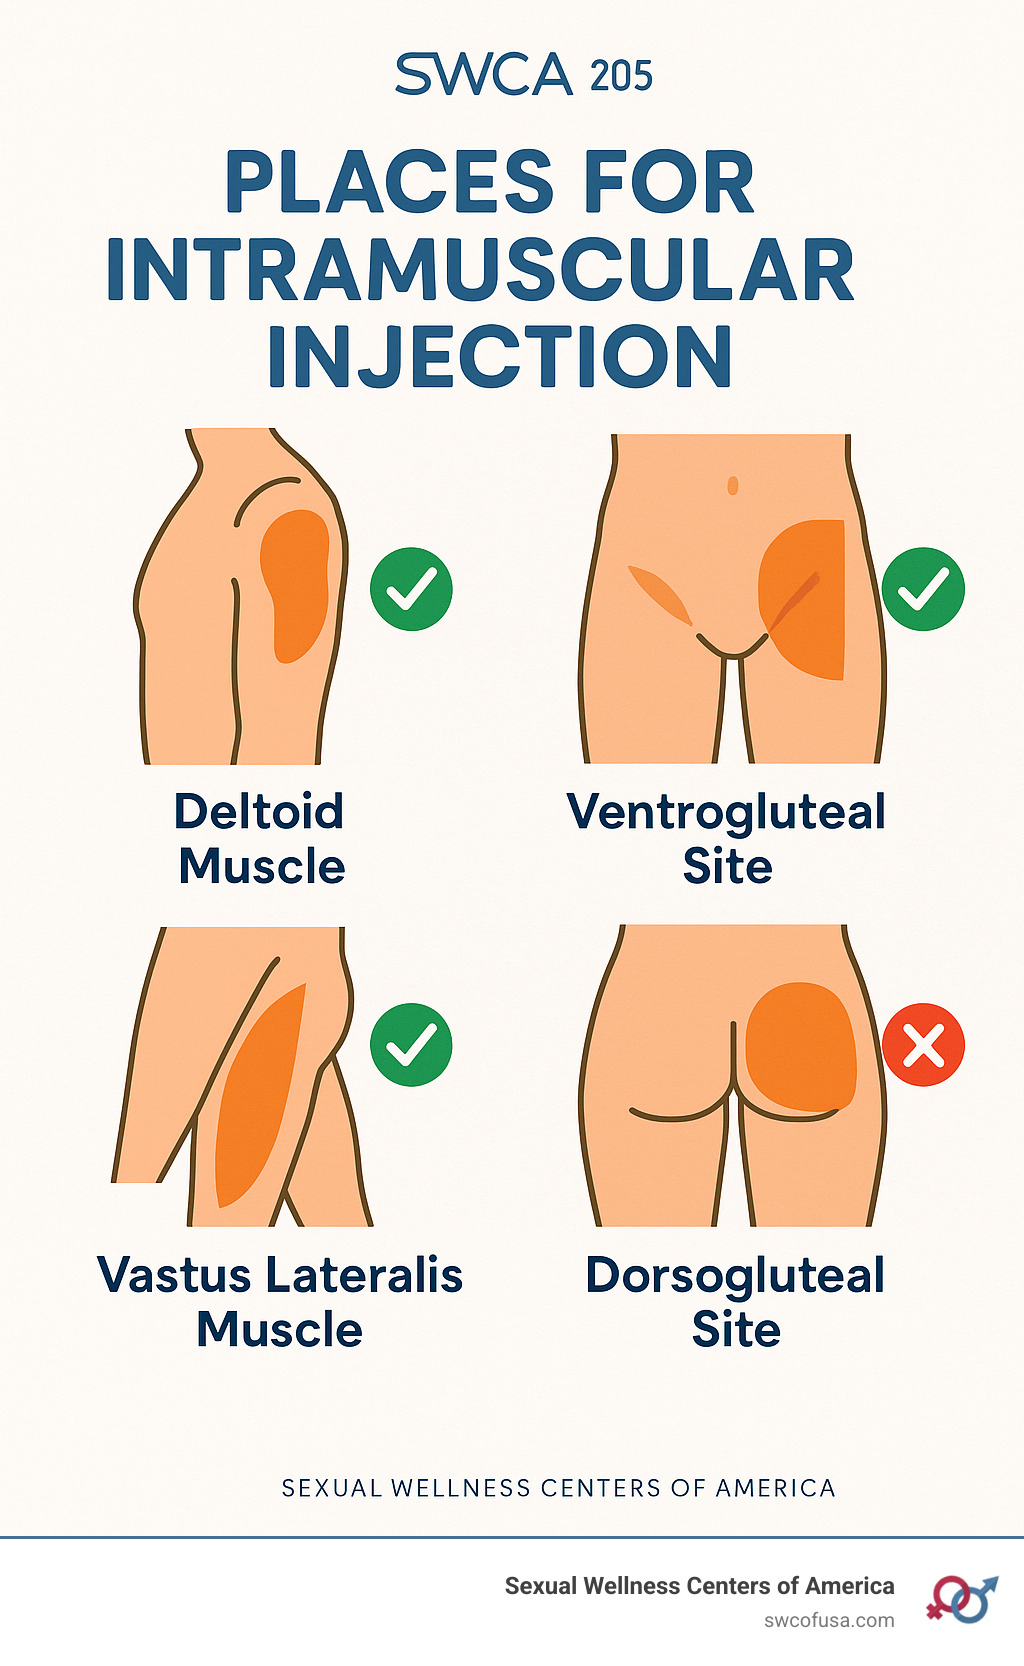
The Four Primary Places for Intramuscular Injection
Getting your intramuscular injection in the right spot makes all the difference between a smooth experience and potential complications. Places for intramuscular injection aren’t just random choices – each location has specific advantages that make it perfect for certain situations.
Think of your body like a map with four main territories for IM injections. Each territory has its own personality, capacity, and safety profile. Understanding these differences helps you make the best choice for your specific medication and circumstances.
The Upper Arm (Deltoid Muscle)
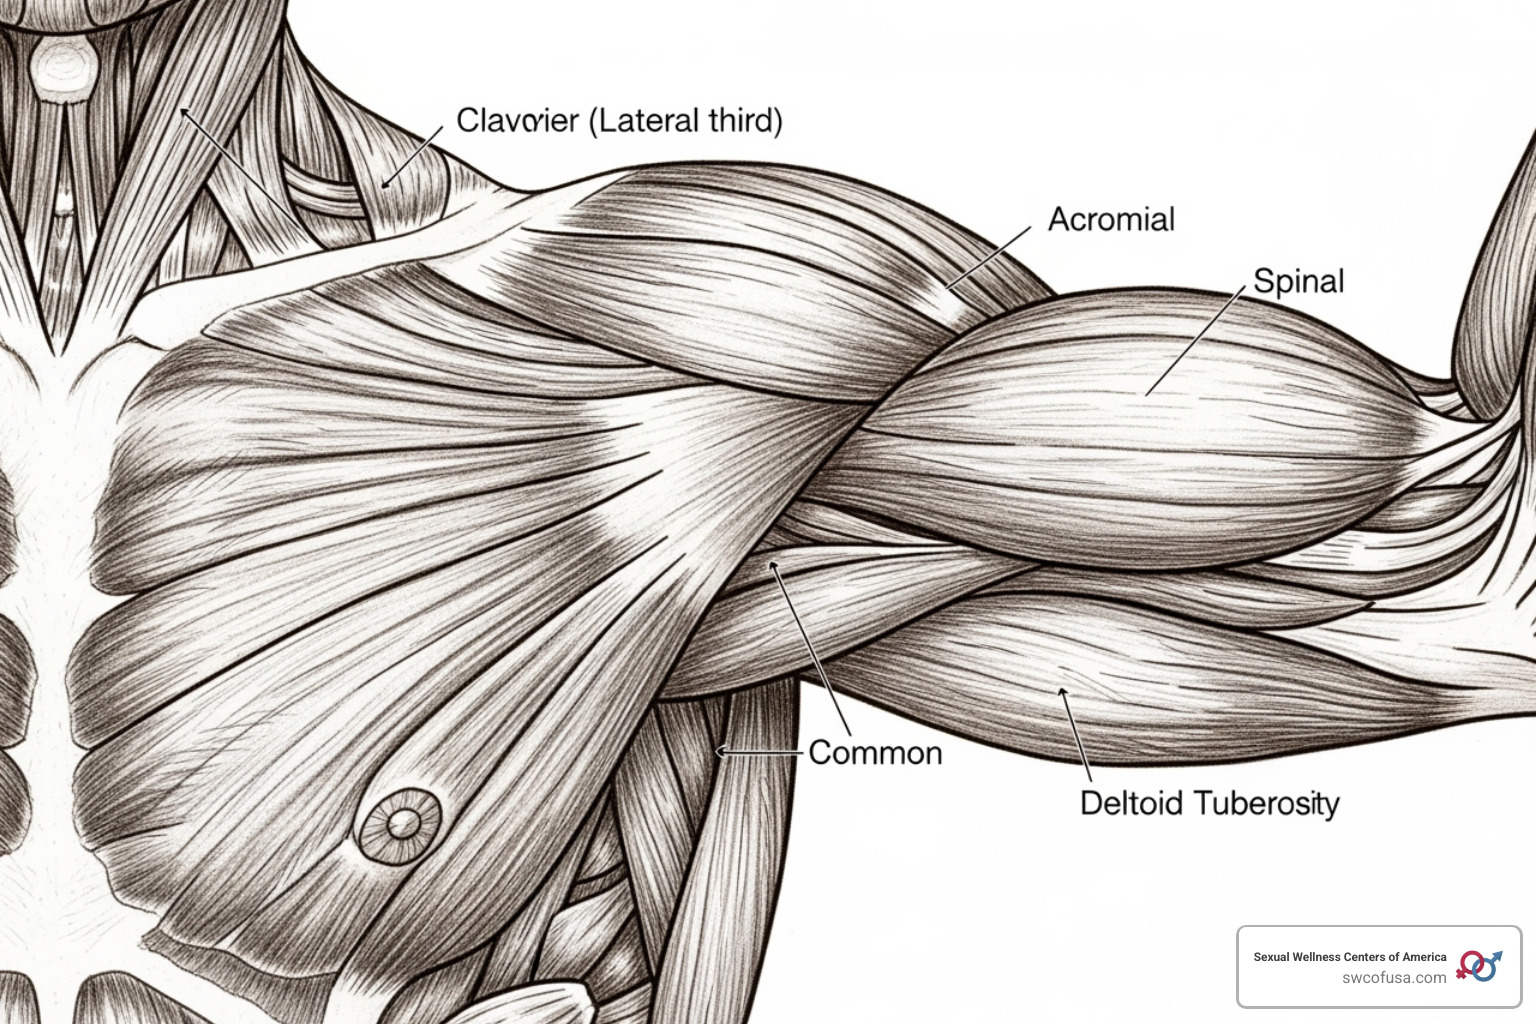
Your deltoid muscle is probably the most familiar injection site – it’s where you likely got your last vaccine. This triangular muscle sits right on your upper arm, making it easily accessible for healthcare providers.
Finding your deltoid is straightforward once you know the landmarks. Feel for the hard, bony bump at the top of your shoulder – that’s your acromion process. Picture an upside-down triangle with its base running along this bone. The sweet spot for injection sits right in the center of this triangle, about two finger-widths down from the acromion.
The deltoid works best for small volumes of medication – typically 1 mL or less. Think of it as the compact car of injection sites. It gets the job done efficiently for vaccine administration and other small-dose medications, but don’t expect it to handle the heavy lifting.
Age matters with deltoid injections. While it’s perfect for adults and children over 3 years old, babies and toddlers don’t have enough muscle development here. Very thin individuals might also need to consider other options.
Here’s the reality check: deltoid injections are not ideal for self-injection. Unless you’re ambidextrous or enjoy awkward contortions, reaching your own deltoid while maintaining proper technique can feel like trying to pat your head and rub your stomach simultaneously.
The Hip (Ventrogluteal): A Safe Place for Intramuscular Injection
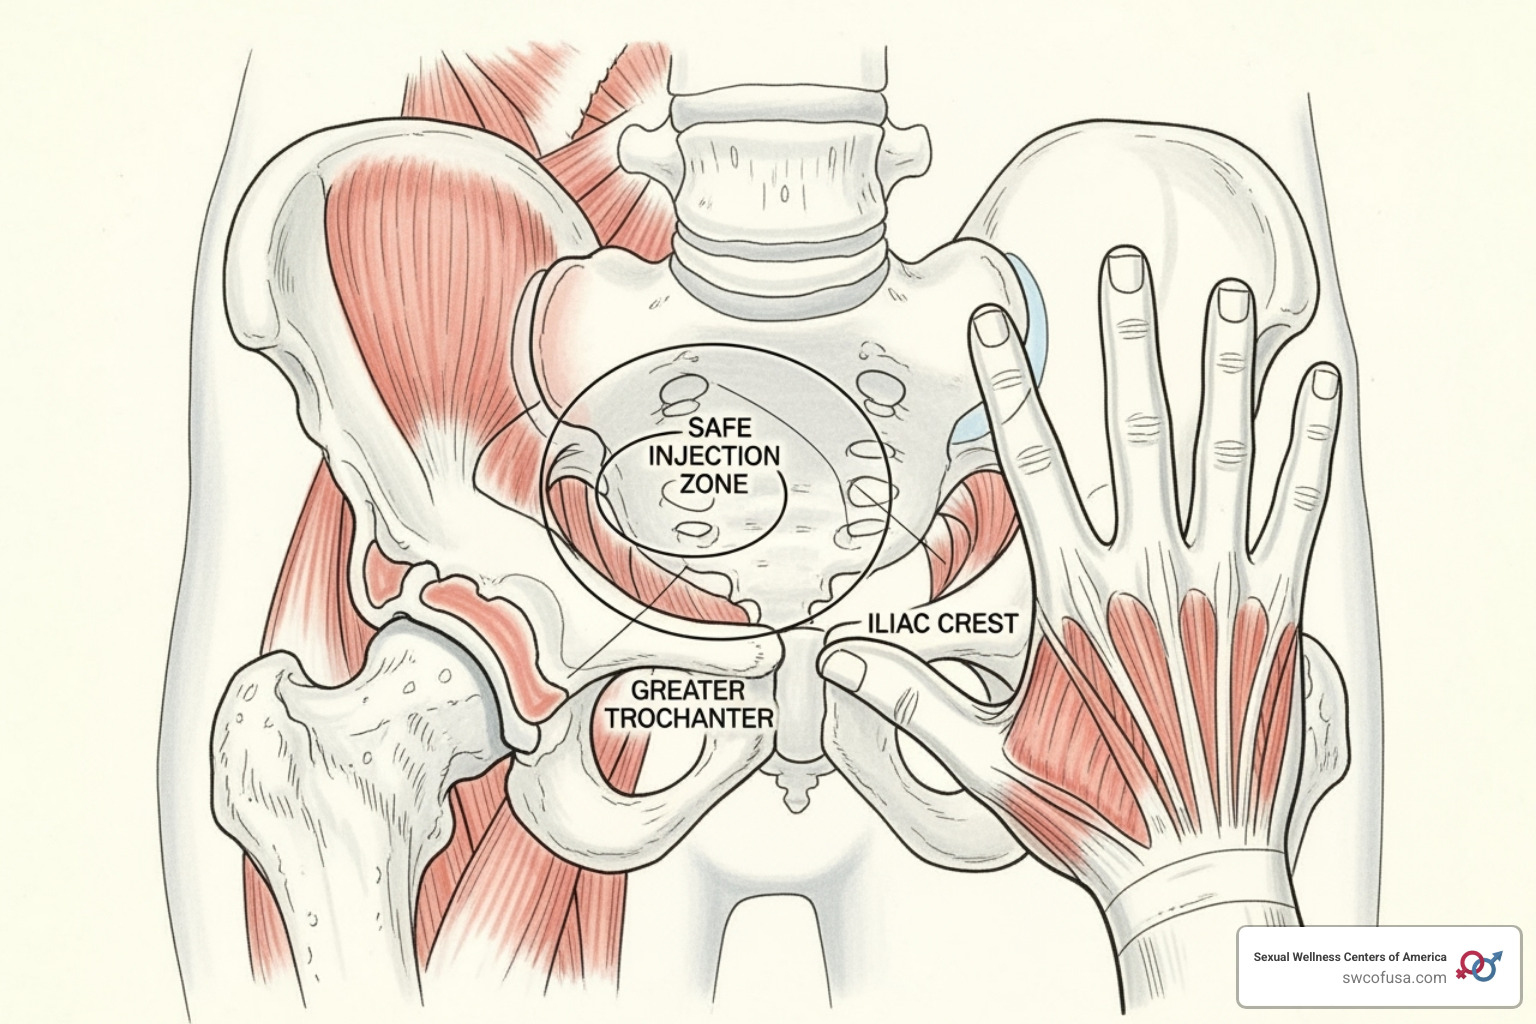
If injection sites had safety ratings, the ventrogluteal site would earn five stars. This hip location represents the gold standard for IM injections because it sits comfortably away from major nerves and away from blood vessels.
Locating the ventrogluteal site requires a bit more finesse than other locations, but the payoff in safety makes it worthwhile. Start by finding the greater trochanter – that bony prominence on the side of your hip where your thigh bone meets your pelvis. Place your palm there, then point your index finger toward the iliac crest (the top ridge of your hip bone).
Create a V-shape hand placement by spreading your middle finger back along the crest. The injection zone sits right in the center of this V-shaped valley your fingers create.
This site ranks as the safest site for adults and infants over 7 months old. The thick muscle mass provides excellent medication absorption while keeping you far from the troublesome sciatic nerve that causes problems elsewhere.
The ventrogluteal site’s superpower is handling larger volume injections – up to 4mL in well-developed adults. This makes it perfect for medications that require higher doses or have a thicker consistency.
Locating the Thigh: The Best Place for Intramuscular Injection Self-Administration
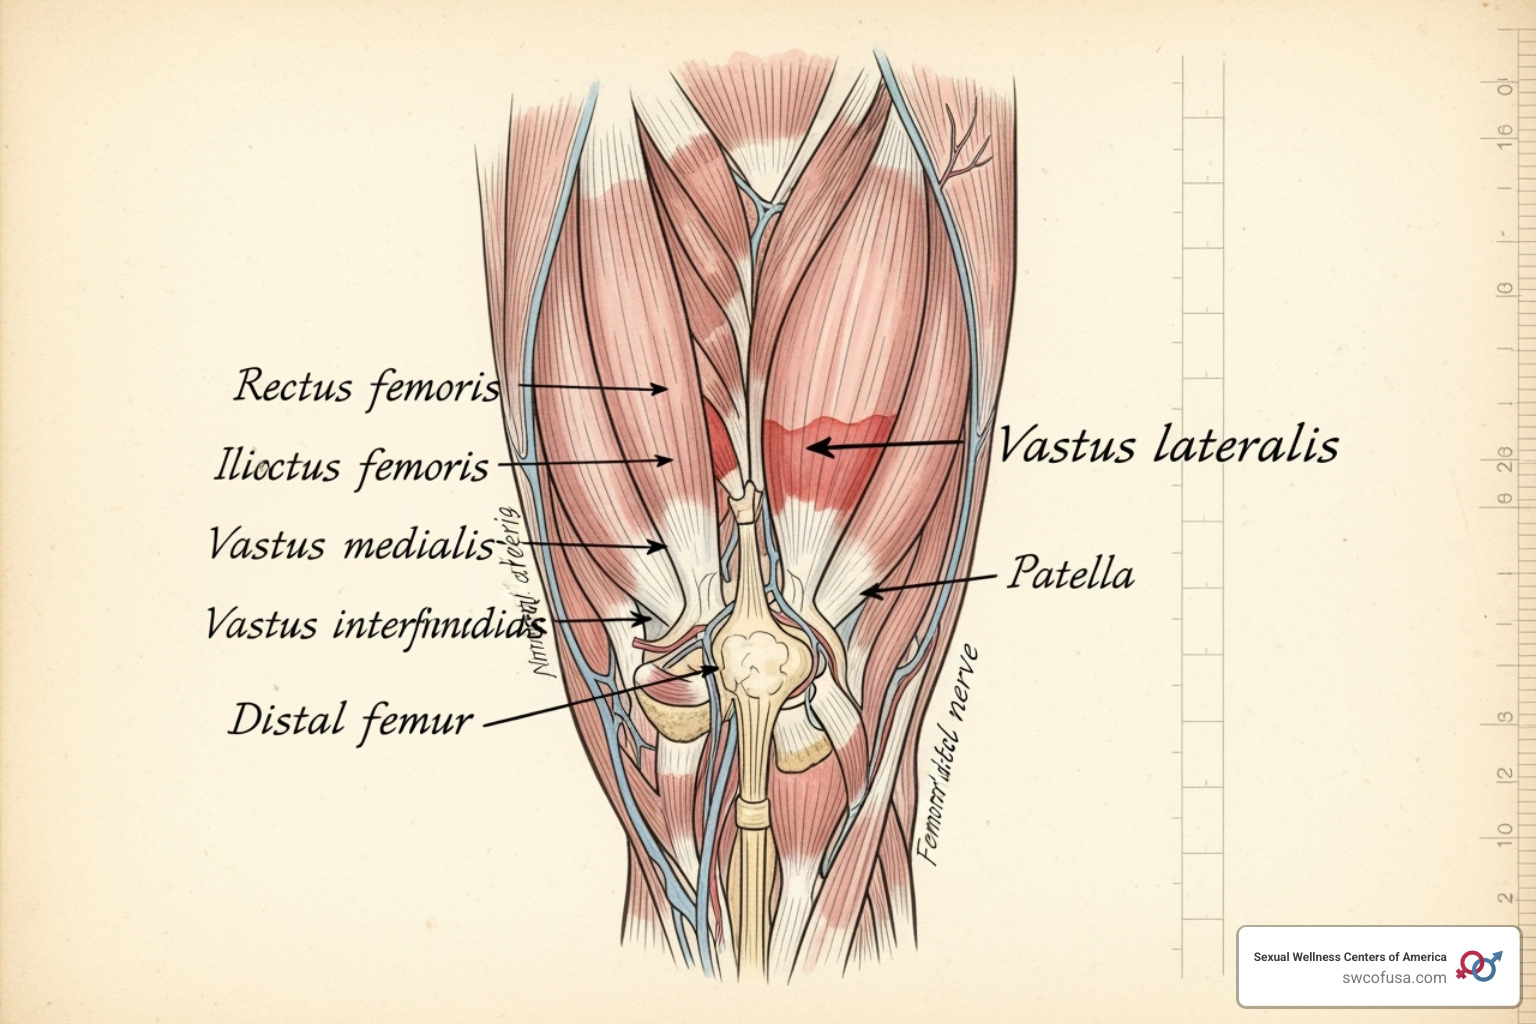
The vastus lateralis muscle in your thigh wins the award for most user-friendly injection site. If you need to give yourself regular injections, this location becomes your best friend.
Dividing thigh into thirds gives you the perfect roadmap. Imagine your thigh split into three equal sections from hip to knee. The target zone sits in the outer middle third – specifically on the outer side of your thigh in that middle section. This keeps you safely positioned in the vastus lateralis while avoiding the rectus femoris muscle toward the front, which has more blood vessels and nerves.
This site is ideal for self-injection because you can easily see what you’re doing, reach it comfortably with either hand, and maintain steady control throughout the process. No mirror required, no awkward angles – just straightforward access.
The thigh also serves as the preferred site for infants and young children. Babies have well-developed thigh muscles even before they start walking, making this location both safe and effective for their vaccinations and medications.
Recent research confirms what healthcare providers have long suspected – the middle of the vastus lateralis offers excellent safety margins. An anatomical study on thigh safety demonstrated significantly lower risks of hitting major blood vessels or nerves compared to other thigh locations.
For comprehensive guidance on thigh injection techniques, check out our detailed guide on IM Shot in Thigh.
The Buttocks (Dorsogluteal Muscle)
The dorsogluteal site in your buttocks carries a complicated history in injection medicine. While it was once popular among healthcare providers, modern medical practice has largely moved away from this location due to significant safety concerns.
Locating the site involves dividing the buttock into four imaginary sections and targeting the upper outer quadrant. However, this seemingly simple landmark system masks serious underlying risks.
The primary concern is sciatic nerve risk. This major nerve runs through the buttock area, and an injection placed too close can cause severe pain, numbness, tingling, or even permanent leg problems. Unlike other injection sites where major structures are predictably located, the sciatic nerve’s path varies more between individuals.
What was once historically common has become now less recommended as safer alternatives like the ventrogluteal site gained recognition. The medical community’s understanding of injection site safety has evolved significantly over the past few decades.
If this site absolutely must be used, it requires professional administration only. The complex anatomy and potential for injury make it completely unsuitable for self-injection. Additionally, it’s not for children under 3 years old due to their underdeveloped muscle mass and higher nerve injury risk.
For detailed information about gluteal injection considerations and safer alternatives, visit our guide on IM Injection Gluteal Muscle.
Mastering the Technique: How to Give an IM Injection Safely
Now that you know the best places for intramuscular injection, let’s walk through the actual technique. Getting this right isn’t just about following steps—it’s about building confidence and ensuring your medication works exactly as intended.
The truth is, many people feel nervous about their first injection. That’s completely normal! With proper preparation and technique, you’ll find it becomes much more manageable. The key is taking your time and never rushing through the process.
Step 1: Gather and Prepare Your Supplies
Think of this step as setting yourself up for success. Having everything organized and within reach makes the entire process smoother and safer.
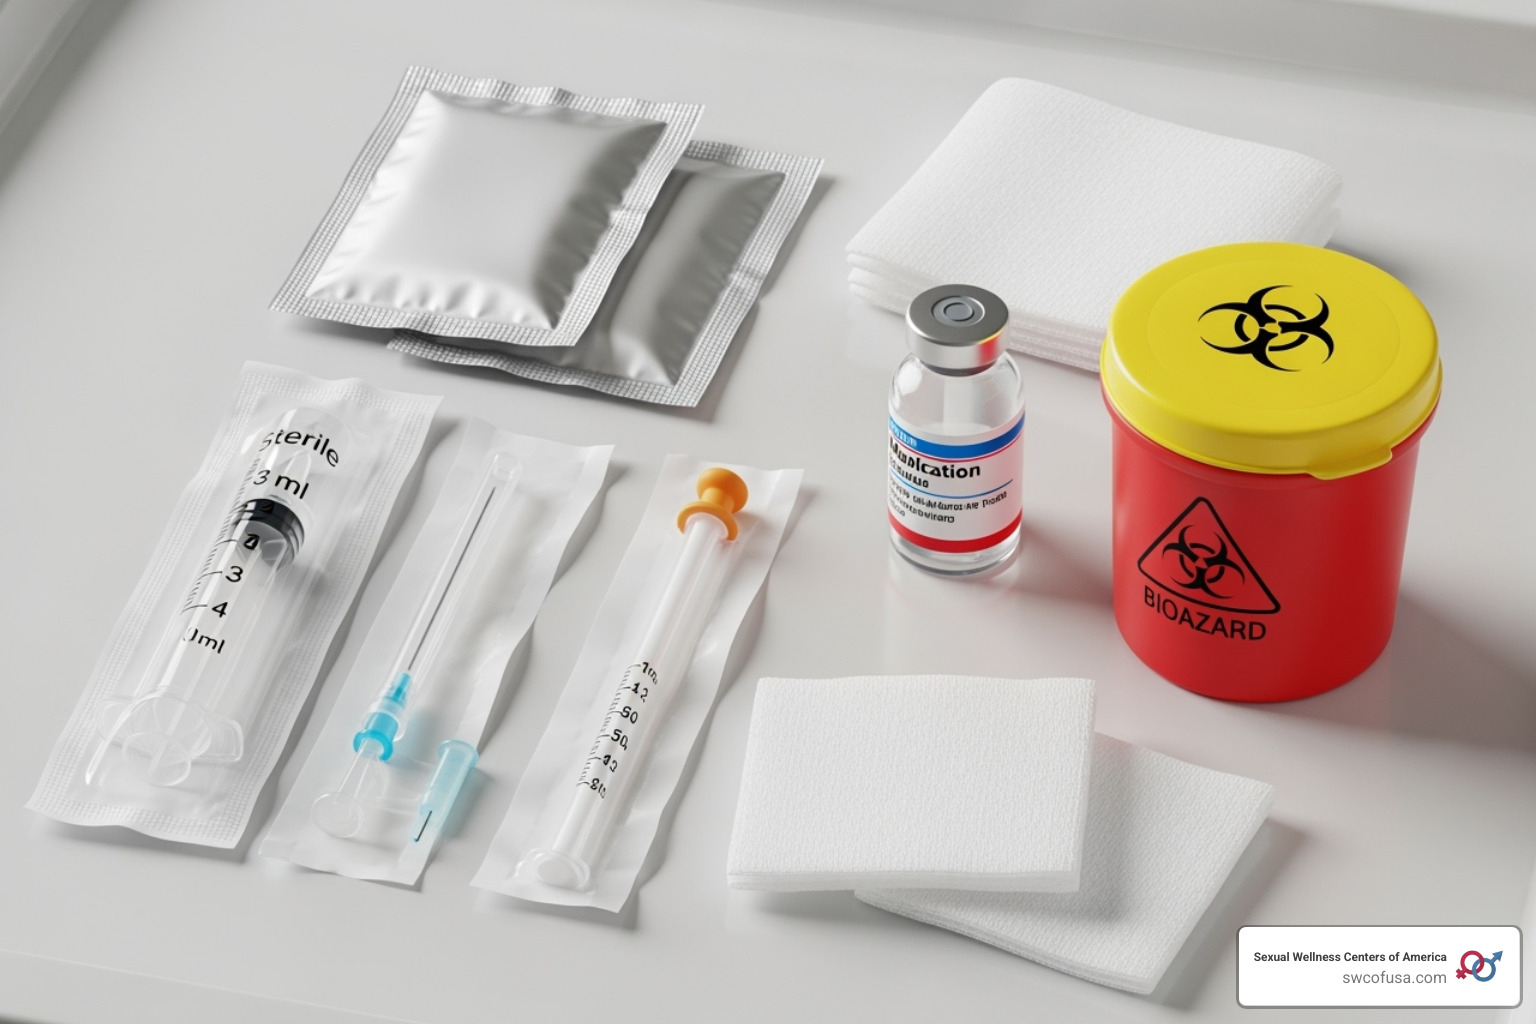
Your medication should be at room temperature and checked for expiration dates. A new, sterile needle and syringe matched to your injection site—typically 22-25 gauge and 1-1.5 inches long. Alcohol wipes for cleaning the injection site thoroughly. Sterile gauze or cotton balls for applying gentle pressure afterward. A small bandage if needed, and most importantly, a puncture-resistant sharps container for safe disposal.
Aseptic technique starts with your hands. Wash them thoroughly with soap and warm water for at least 20 seconds. This isn’t just a suggestion—it’s your first line of defense against infection. If you’re somewhere without access to soap and water, use an alcohol-based hand sanitizer that’s at least 60% alcohol.
Think of hand washing as creating a clean workspace around yourself. You’ll want to wash again after the injection too, making it a bookend to your entire process.
Step 2: The Injection Process
Here’s where your preparation pays off. The actual injection should feel smooth and confident, not rushed or hesitant.
Start by cleaning your chosen injection site with an alcohol wipe, moving from the center outward in expanding circles. Let it air dry completely—this prevents that sharp sting when the needle goes in and ensures the alcohol does its antiseptic work.
Preparing your medication requires attention to detail. Clean the rubber stopper of your vial with an alcohol wipe. Draw air into your syringe equal to your medication dose, then inject this air into the vial to prevent vacuum buildup. Turn the vial upside down and draw up your exact dose. Tap the syringe gently to bring any air bubbles to the top, then push the plunger slightly to expel them.
90-degree angle insertion is crucial for reaching the muscle tissue. Hold your syringe like a dart—firm but relaxed. Spread the skin taut at your injection site with your non-dominant hand. Insert the needle straight down in one swift, confident motion. Don’t hesitate here; a quick insertion actually causes less discomfort than a slow, tentative one.
Once you’re in the muscle, push the plunger slowly and steadily. Rushing this step can increase pain and cause the medication to pool incorrectly. Take your time—your muscle needs a moment to accommodate the medication.
Withdrawing the needle should be just as quick as insertion. Pull straight out at the same 90-degree angle, then immediately apply gentle pressure with your gauze. Don’t rub the area—this can cause bruising or push medication into the wrong tissue layer.
The evidence-based injection technique research supports this methodical approach for both safety and effectiveness.
Step 3: Understanding the Z-Track Method
The Z-track method might sound complicated, but it’s actually a clever technique that prevents medication from leaking back through the injection path.
Here’s how it works: Before inserting your needle, use your non-dominant hand to pull the skin and underlying tissue about 1-1.5 inches to one side. Keep holding it there while you inject. After you withdraw the needle, release the skin. This creates a zigzag path that seals the medication deep in the muscle where it belongs.
When should you use Z-track? Your healthcare provider will tell you if your specific medication requires this technique. It’s particularly important for irritating medications that could damage tissue if they leak out, and oily solutions that might stain your skin—think iron injections that can leave permanent marks.
The timing matters with Z-track injections. After you inject the medication, wait about 10 seconds before withdrawing the needle. This gives the medication time to disperse properly in the muscle tissue.
Most people find Z-track slightly more challenging at first, but it becomes second nature with practice. The extra step is worth it for medications that need this level of precision—it prevents complications and ensures you get the full benefit of your treatment.
Essential Safety and Comfort Considerations
Let’s be honest—nobody looks forward to getting a shot. But knowing how to make the experience as comfortable and safe as possible can transform your injection routine from something you dread into something you handle with confidence.
When you understand the right techniques and safety measures, places for intramuscular injection become much less intimidating. We’re here to guide you through everything you need to know to stay safe and comfortable.
Choosing the Right Needle
Think of needle selection like choosing the right tool for a job. The wrong needle can make your injection painful, ineffective, or even unsafe. Getting it right makes all the difference in your comfort and treatment success.
Needle gauge refers to how thick or thin your needle is. Here’s where it gets a bit backwards—higher numbers mean thinner needles. A 25-gauge needle is much thinner than a 22-gauge needle. Thinner needles hurt less going in, but they might not work well with thick medications that need more room to flow through.
Needle length is all about reaching the right spot. Too short, and your medication stays in the fat layer instead of the muscle. Too long, and you might hit bone (ouch!). Most adults need a 1-inch needle, but this changes based on your body type and injection site.
Here are some general guidelines for choosing the right needle:
| Injection Site | Patient Weight/Muscle Mass | Recommended Needle Gauge | Recommended Needle Length |
|---|---|---|---|
| Deltoid (Arm) | Adult (average) | 23-25g | 1 inch |
| Adult (obese) | 22-23g | 1.5 inches | |
| Child (3-18 years) | 23-25g | 5/8 – 1 inch | |
| Ventrogluteal (Hip) | Adult (average) | 21-23g | 1 – 1.5 inches |
| Adult (obese) | 21g | 1.5 – 2 inches | |
| Infant (>7 months) | 23-25g | 5/8 – 1 inch | |
| Vastus Lateralis (Thigh) | Adult (average) | 21-23g | 1 – 1.5 inches |
| Adult (obese) | 21g | 1.5 – 2 inches | |
| Infant (<7 months) | 23-25g | 5/8 – 1 inch |
Your body composition matters more than you might think. If you have more subcutaneous fat or greater muscle mass, you’ll need a longer needle to reach the muscle properly. Very thin individuals might need shorter needles to avoid hitting bone.
Medication viscosity also plays a role. Thick, syrupy medications need wider needles (lower gauge numbers) to flow through easily. Your healthcare provider will help you choose the right combination for your specific situation.
Minimizing Pain and Discomfort
The good news? There are plenty of tricks to make your injection experience much more comfortable. These techniques can turn a dreaded shot into something barely noticeable.
Relaxing the muscle is your first line of defense against pain. Tense muscles fight the needle, making everything more uncomfortable. If you’re injecting into your thigh, sit down and let that leg relax completely. For arm injections, let your arm hang loose at your side. Take a few deep breaths—it really does help.
Numbing with ice works like magic for many people. Hold an ice pack on your injection site for 5-10 minutes before cleaning the area. This simple step can significantly reduce the needle stick sensation.
Allowing alcohol to dry prevents that sharp stinging feeling. After cleaning with an alcohol wipe, wait for the area to air dry completely. Don’t blow on it or fan it—just give it a moment to dry naturally.
Quick insertion beats slow and hesitant every time. Think dart throw, not slow push. A confident, swift insertion hurts less than tentative poking.
The slow injection technique matters just as much. Push that plunger slowly and steadily. Rushing the medication in creates pressure and discomfort you can easily avoid.
Site rotation becomes crucial if you need regular injections. Using the same spot repeatedly leads to scar tissue buildup and lipohypertrophy (thickened, lumpy skin). Create a rotation schedule so you don’t hit the same spot more than once a month.
Warming cold medication by rolling the vial between your hands for a few minutes can make the injection much more comfortable. Cold medication straight from the refrigerator can be quite shocking to your system.
Potential Complications and When to Seek Help
While serious complications from properly administered IM injections are rare, knowing what to watch for gives you peace of mind and keeps you safe.
Severe pain that doesn’t improve within a day or two isn’t normal. Some soreness is expected, but intense or worsening pain needs attention.
Excessive bleeding beyond a few drops should be evaluated. Normal bleeding stops with gentle pressure within a few minutes.
Redness or swelling that spreads or gets worse over time could signal infection. A little redness right around the injection site is normal, but watch for increasing warmth or any drainage that looks like pus.
Signs of allergic reaction require immediate action. Watch for rash, hives, difficulty breathing, or swelling of your face, lips, or throat. These symptoms mean call 911 right away—don’t wait.
Tingling or numbness in the area could indicate nerve irritation. While usually temporary, it’s worth mentioning to your healthcare provider.
Persistent lumps or bruises that don’t fade after a week or two should be checked out. Some bruising is normal, but growing or hard lumps need evaluation.
Safe sharps disposal protects everyone in your household. Always use a puncture-resistant sharps container and dispose of needles immediately after use. Never recap, bend, or break used needles—this leads to dangerous accidents.
The CDC guidelines on vaccine safety provide comprehensive information about recognizing adverse reactions and knowing when to seek medical care.
At Sexual Wellness Centers of America, we’re always here to support you through your treatment journey. These safety measures help ensure your places for intramuscular injection remain effective and comfortable throughout your wellness plan.
Frequently Asked Questions about IM Injections
Over the years, we’ve helped thousands of patients master their injection techniques, and certain questions come up time and again. Let me share the answers to the most common concerns about places for intramuscular injection and proper technique.
Do you pinch the skin for an IM injection?
This is one of the most frequent mix-ups we see! No, you should never pinch the skin for an IM injection. Instead, you want to spread the skin taut—meaning you firmly stretch it at the injection site.
Here’s why this matters: pinching the skin is actually the correct technique for subcutaneous injections, where you’re delivering medication into the fatty layer just beneath the skin. But for intramuscular injections, pinching would actually work against you.
When you stretch the skin taut for an IM injection, you’re helping ensure that needle goes straight into the muscle tissue where it belongs, not getting caught up in the subcutaneous layer. Think of it like creating a clear pathway for the needle to reach its intended destination.
Can you hit a bone or a nerve?
This question keeps many people up at night, but here’s the reassuring truth: it’s extremely unlikely if you use the correct landmarks and needle length. We’ve designed our injection site recommendations specifically to keep you safe.
When you choose safer places for intramuscular injection like the ventrogluteal site or vastus lateralis muscle, you’re picking locations that stay far away from major nerves and blood vessels. These sites weren’t chosen randomly—they’re the result of decades of medical research aimed at keeping you safe from complications like sciatic nerve injury.
The key is using proper technique and the right needle size for your body. A needle that’s appropriate for your muscle mass and subcutaneous fat layer will reach the muscle without going too deep. While it’s theoretically possible to hit bone in smaller muscles if you miss the thickest part, this rarely causes lasting pain or complications.
Millions of IM injections happen safely every day using these established landmarks. Trust the process, and don’t let worry prevent you from getting the treatment you need.
How often should I rotate injection sites?
If you’re on regular injection therapy—whether it’s hormone replacement, vitamin B12, or other treatments—you should rotate injection sites with each dose. This isn’t just a suggestion; it’s essential for maintaining healthy tissue and effective absorption.
Here’s what we recommend: create a simple rotation schedule that prevents you from injecting into the same spot more than once a month. For example, if you’re doing weekly injections, you might rotate between your right thigh, left thigh, right ventrogluteal site, and left ventrogluteal site.
Why does this matter so much? Repeated injections in the exact same location can lead to scar tissue buildup and a condition called lipohypertrophy—basically lumps of fat that form under the skin. Not only do these changes affect how your skin looks and feels, but they can also interfere with how well your medication absorbs.
Think of site rotation as an investment in your long-term treatment success. Your future self will thank you for taking this extra step to preserve healthy injection sites and maintain consistent medication effectiveness.
Conclusion: Taking Control of Your Wellness Journey
Learning the proper places for intramuscular injection isn’t just about following medical instructions—it’s about taking an active role in your health and feeling confident about your treatment. When you understand where and how to give these injections safely, you’re setting yourself up for better results and fewer complications.
Proper site selection is the foundation of safe injection technique. The ventrogluteal site offers the best safety profile for most adults, while the vastus lateralis in your thigh works perfectly for self-administration. The deltoid muscle handles vaccines and small volumes well, but remember its limitations. And while the dorsogluteal site was popular in the past, we now know there are much safer options available.
Safe technique goes hand in hand with smart site selection. Using the right needle size, maintaining sterile conditions, and following proper injection angles all contribute to minimizing your risk and maximizing your medication’s effectiveness. Don’t forget about comfort measures like site rotation and proper preparation—these small steps make a big difference in your overall experience.
At Sexual Wellness Centers of America, we’ve seen how proper injection technique transforms our patients’ treatment experiences. Whether you’re receiving HEshot®, SHEshot®, or other therapies that require intramuscular delivery, understanding these fundamentals helps you get the most from your personalized treatment plan.
Your wellness journey is exactly that—yours. We believe in giving you the knowledge and confidence to participate actively in your care. When you understand the science behind your treatment and feel comfortable with the process, you’re more likely to stick with your plan and see the results you’re looking for.
If you’re in the Colleyville area and want to learn more about how proper injection techniques can improve your treatment outcomes, we’re here to help. Our team combines clinical expertise with patient education to ensure you feel supported every step of the way.
Learn more about our IM Injections in Colleyville, TX.